Beginner’s guide: How to set up and manage a WooCommerce store
Picture this: an online store that practically runs itself, leaving you free to focus on growth. Sounds like a dream, doesn’t it? Welcome to the world of WooCommerce. Building and managing your online store is easier than you might think.
WooCommerce, for those unfamiliar, is a powerful e-commerce platform built specifically for WordPress websites. It empowers entrepreneurs like you to create, customise, and scale your online stores with ease. In this beginner guide, we’ll walk you through every step of the WooCommerce journey, from setting up your store to maximising your sales and more.
Let’s dive in:
Section 1: Getting started with WooCommerce
1. Choose a hosting service and install WooCommerce
Selecting the right hosting provider lays the foundation for your WooCommerce store’s performance and reliability. Follow these steps to choose hosting and install WooCommerce:
Step 1: Sign up with a hosting provider
Start by researching reputable hosting providers that offer WordPress hosting services. Look for providers known for their reliability, performance, and customer support. Consider factors like server resources, uptime guarantees, scalability, and support for WooCommerce. Once you’ve chosen a hosting provider, sign up for a hosting plan that aligns with your needs. Follow the provider’s instructions to create an account and purchase a hosting plan.
Step 2: Install WordPress
Most hosting providers offer easy one-click installations for WordPress. Log in to your hosting account’s control panel (often cPanel or a similar interface) and locate the WordPress installation option. Follow the on-screen instructions to install WordPress on your domain. You may need to choose a domain name, directory, and provide administrative details for your WordPress site.
Step 3: Install WooCommerce
After installing WordPress, access your WordPress dashboard by navigating to your domain’s URL followed by “/wp-admin” (e.g. yourdomain.com/wp-admin).
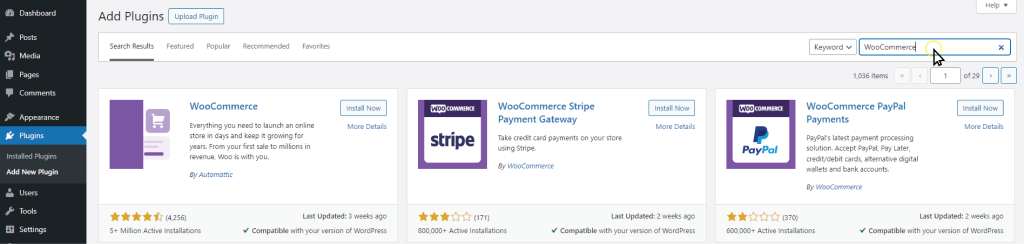
Once logged in, go to the “Plugins” section and click on “Add New.”

Search for “WooCommerce” in the search bar.
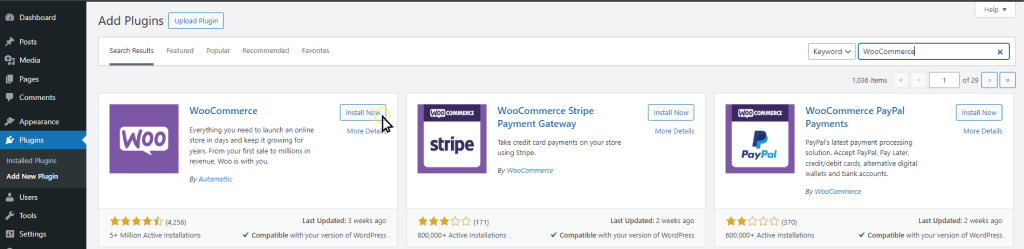
Click “Install Now” next to the WooCommerce plugin.
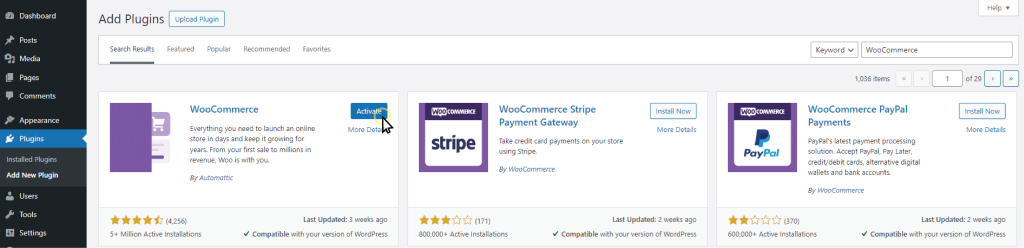
After installation, click “Activate” to activate the plugin.
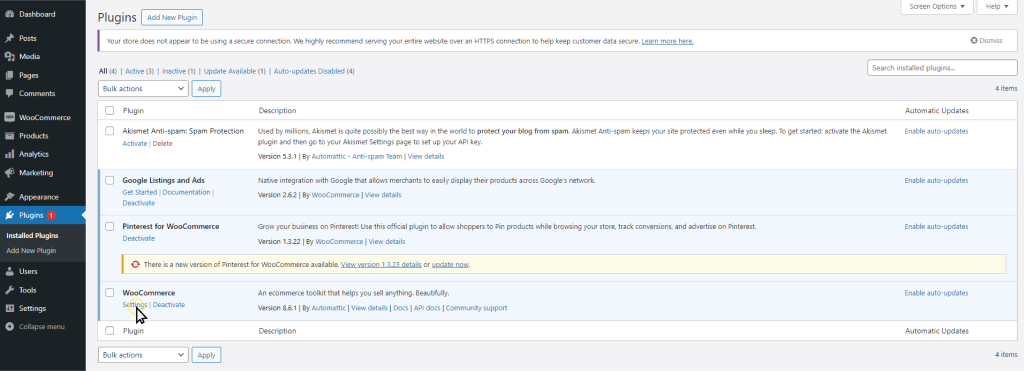
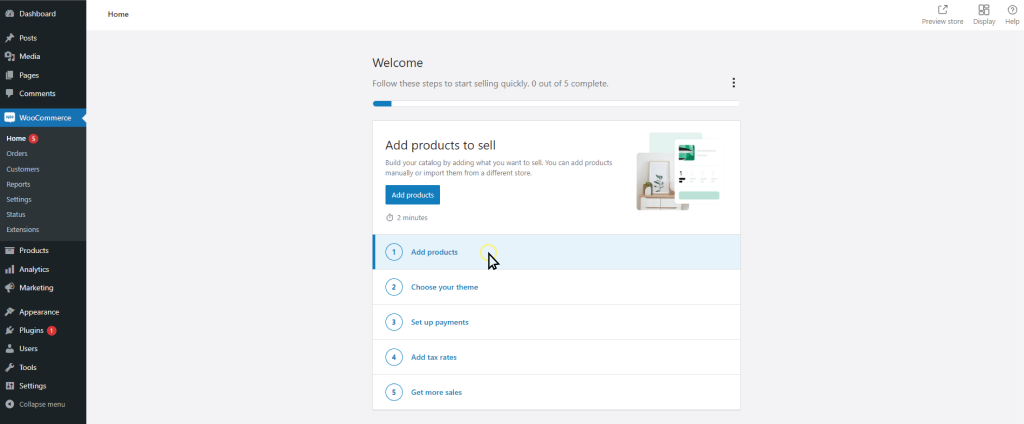
Congratulations! You’ve now installed WooCommerce on your WordPress site. Let’s move on to setting up your store.
2. Set up your store
Now that WooCommerce is installed, it’s time to set your store settings, add products, and set up payment gateways. Follow these steps to get your store up and running:
Step 1: Adjust basic settings
Navigate to the WooCommerce settings page in your WordPress dashboard.
Review and configure basic settings such as currency, location, shipping, and tax options. Customise settings according to your store’s requirements.

Step 2: Add products
To add a new product, go to the “Products” tab in your WordPress dashboard and click on “Add Product.”
Enter the product’s name, description, price, and other relevant details.
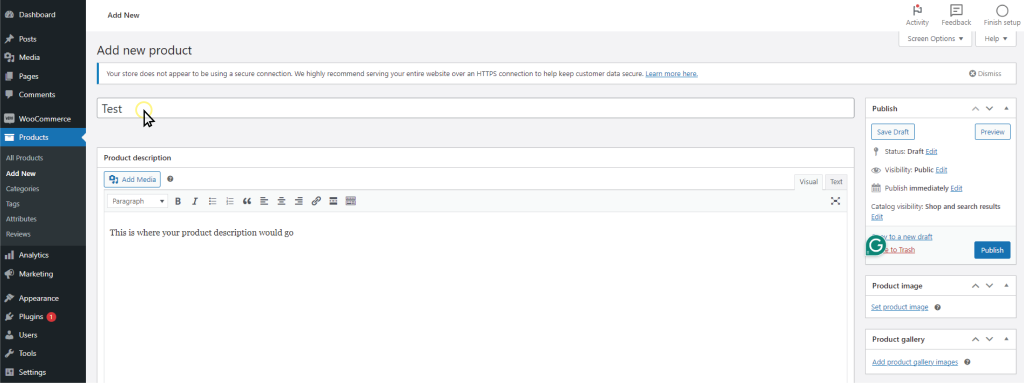
Upload product images and assign categories and tags to organise your products.
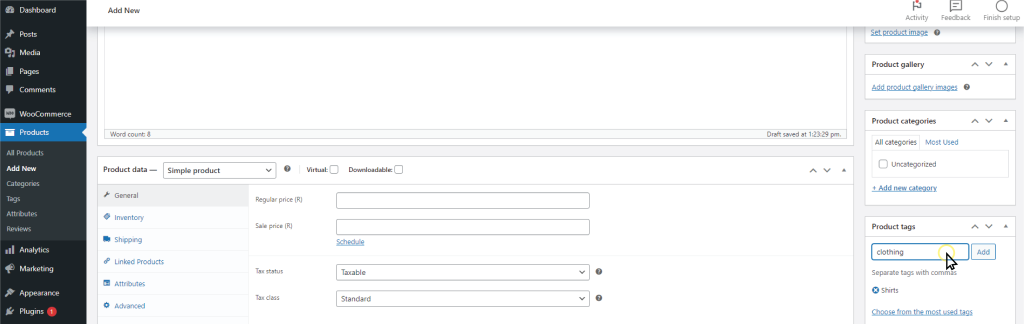
Configure product variations, if applicable, such as size, colour, or quantity options.
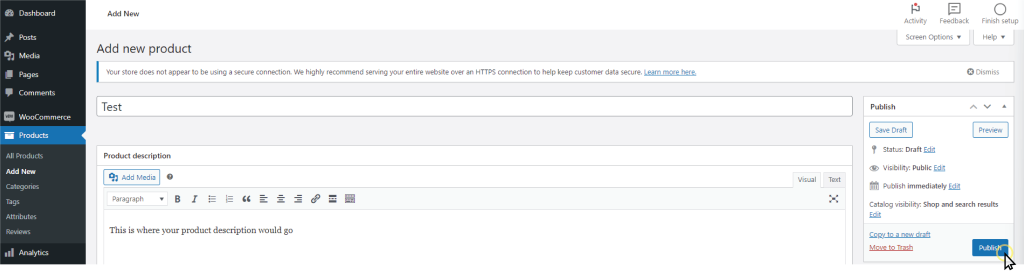
Once done, click “Publish” to make the product live on your store.
Step 3: Set up payment gateways
WooCommerce offers various payment gateway options to accept payments from customers. Navigate to the “WooCommerce” > “Settings” > “Payments” tab to configure payment gateways. Choose from available payment gateways such as PayPal, Stripe, Square, or offline methods like bank transfer or cash on delivery.
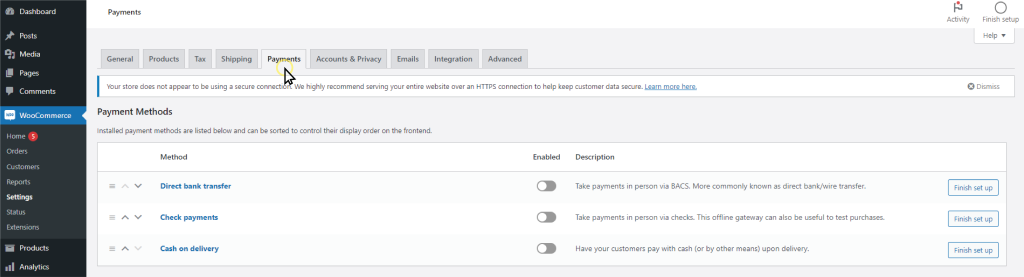
Adjust your payment gateway settings, such as your account details.
Test the payment gateways to ensure they’re functioning correctly before launching your store.
Your WooCommerce store is all set up and ready to start taking orders. In the next sections, we’ll dive into managing your store, boosting sales, and exploring more features to improve your e-commerce experience.
Section 2: Organise your products with categories:
Creating categories helps organise your products and makes navigation easier for customers. To create a new category, go to “Products” > “Categories” in your WordPress dashboard.
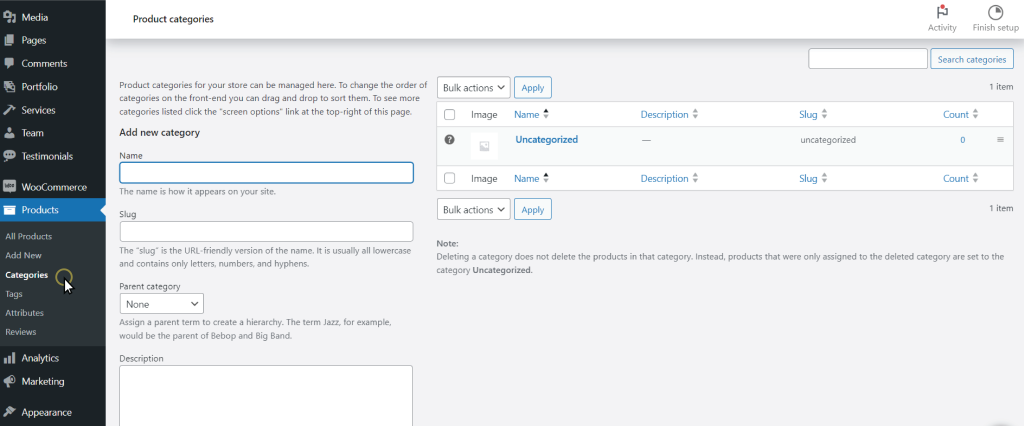
Enter a name for the category and add a description if necessary. Tags can also be added while creating or editing a product. They provide additional information about the product and help users find related items. Properly categorising and tagging products encourages people to explore your store.
Section 3: Optimise your store for sales
Step 1: Choose a Theme
Select a WooCommerce-compatible theme that aligns with your brand aesthetic and provides the customisation options you need. You can browse through the available themes in the WordPress theme section on your dashboard or explore third-party marketplaces for premium themes.
Step 2: Customise colours and fonts
Navigate to the theme customisation settings in your WordPress dashboard to modify these elements.
Step 3: Add your logo and branding
Upload your logo and customise other branding elements such as header images, backgrounds, and icons. These visual elements help establish brand recognition and create a cohesive brand experience for your customers.
Step 4: Optimise your product pages
Add high-quality product images, detailed descriptions, pricing information, and clear call-to-action buttons. Consider implementing product zoom functionality or image galleries to showcase your products effectively.
Step 5: Add widgets and sidebars
Customise your website layout by adding widgets and sidebars to display additional content or features. Popular widgets include product search bars, product categories, recent posts, social media feeds, and newsletter sign-up forms.
Section 4: Manage your orders and customers:
Processing orders
Viewing orders:
Navigate to the Orders section in your WooCommerce dashboard to view a list of all orders received on your store. You can filter orders by status, date, or customer, making it easy to locate specific orders.
Managing order status:
WooCommerce provides several order statuses, including Pending, Processing, Completed, On-Hold, Cancelled, and Refunded. You can update the status of an order based on its progress, such as when it’s being processed, shipped, or delivered.
Updating tracking information:
For orders that require shipping, you can add tracking information to keep customers informed about the status of their delivery. WooCommerce allows you to enter tracking numbers and shipping carriers directly from the order details page.
Adding order notes:
Communicate important information with customers by adding order notes. Whether it’s notifying them of a delay, requesting additional information, or providing updates on their order status, order notes help keep customers informed and engaged.
Expert tip – If you want to automate some of the process, the WooCommerce Smart Reminder Emails plugin can help. It automatically sends emails to your customers like payment reminders or follow ups.
Section 5: Enhance your store with plugins:
WooCommerce plugins are powerful tools that can expand on what your online store can do. Whether you’re looking to streamline store management, improve your customer experience, or boost sales, there’s a plugin available to help you achieve your goals. From adding new features to customising existing ones, WooCommerce plugins offer endless possibilities for optimising your store.
Here are some of our top recommendations:
1. WooCommerce PDF Invoices & Packing Slips Professional
This plugin simplifies the process of generating professional invoices and packing slips for your orders. With customisable templates and automatic generation, you can create branded documents that reflect your store’s identity. Additionally, features like email/print/download options and bulk exporting make managing invoices a breeze, saving you time and effort.
2. WooCommerce Customer Manager
Keep track of your customers and their orders with ease. Manage customer information, view order history, and track customer interactions to provide a personalised service for each customer.
Display your store’s opening hours on your website. Customise opening and closing times for each day of the week, and automatically display whether your store is open or closed to customers.
4. WooCommerce EU/UK VAT Compliance
Ensure compliance with EU and UK VAT regulations for your WooCommerce store. Automatically calculate and apply VAT rates based on customer location, and generate VAT-compliant invoices for hassle-free tax reporting.
5. Menu Cart Pro
Enhance your website’s navigation and shopping experience with a customizable cart menu. Display cart contents, total amount, and checkout options in a sleek and intuitive dropdown menu, improving accessibility and encouraging conversions.
Section 6: Track your store’s performance
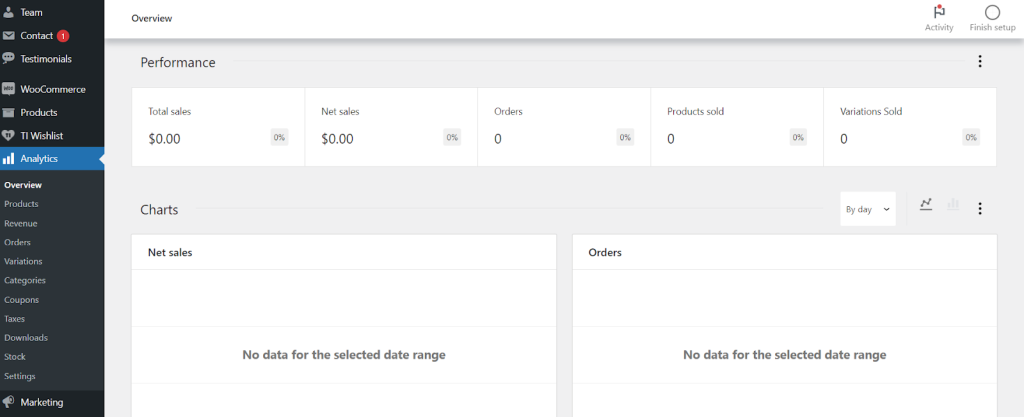
Use WooCommerce’s built-in analytics:
Take advantage of the analytics features built into WooCommerce. These tools provide valuable insights into your store’s performance, including sales trends, customer behaviour, and popular products. Navigate to your WooCommerce dashboard and explore the available reports under the “Analytics” section.
Install an analytics plugin:
Consider installing additional analytics plugins to complement WooCommerce’s built-in features. Plugins like Google Analytics for WordPress or MonsterInsights can provide more detailed metrics and customizable reports. Follow the installation instructions provided by the plugin developer and connect your store to your preferred analytics platform.
After following all of these steps, you should have a fully functional online store! Now you can focus on making more sales and keeping your customers happy.
Here are some extra tips to make your online store even better:
Encourage and monitor product reviews:
Product reviews are important for gaining trust and boosting sales. Encourage happy customers to leave reviews by sending follow-up emails or offering discounts. Make it easy for customers to leave reviews on your product pages. Respond quickly to reviews, both good and bad. You can send WooCommerce follow up emails to automatically ask customers to review their purchases. This helps gather feedback and build credibility.
Provide support:
Offer multiple channels for customers to reach out for support, such as email, live chat, or phone support. Make sure your support team is knowledgeable, friendly, and equipped to assist customers with their queries or problems.
Reward loyalty:
Add a loyalty program to reward repeat customers and encourage future purchases. Offer discounts, exclusive offers, or loyalty points for every purchase made, motivating customers to return to your store. You can use a plugin to automatically generate coupons for customers to use on their next purchase.
Set up conversion tracking:
Conversion tracking allows you to monitor specific actions that lead to sales or other desired outcomes on your website, such as completing a purchase or signing up for a newsletter. Add conversion tracking to your analytics tools to measure the effectiveness of your marketing campaigns.
Monitor traffic sources:
Keep an eye on where your website traffic is coming from. Are visitors finding your store through organic search, social media, paid ads, or other channels? Understanding your traffic sources can help you improve your marketing strategies and allocate resources more effectively.
Analyse customer behaviour:
Dive deep into customer behaviour data to understand how visitors interact with your store. Look for patterns in browsing behaviour, product views, add-to-cart actions, and checkout behaviour. Identify any pain points or barriers that may be stopping conversions and take steps to address them.
Experiment:
Don’t be afraid to experiment with different strategies and tactics to improve your store’s performance. A/B testing, for example, allows you to compare the effectiveness of different website elements or marketing campaigns. Continuously monitor the results of your experiments and adjust based on what works best for your store.
Stay informed:
Keep yourself updated on the latest trends and best practices in e-commerce analytics. Follow industry blogs, attend webinars, and join online communities to learn from other merchants and experts in the field. Stay curious and proactive in seeking out opportunities to optimise your store’s performance.
Conclusion:
Setting up and managing a WooCommerce store is totally doable for anyone looking to get into online selling. Just follow the steps we talked about, from picking a hosting provider to adding products and sorting out payment options.
Don’t forget to organise your products into categories, spruce up your store’s look to boost sales, and keep an eye on orders and customers. Plus, tracking how your store’s doing is super important for keeping things on track.
Plugins are a great addition to simplify your processes or to add more features to your store. If you’re looking for a set of plugins to get you started, be sure to check out our bundle deals. They’ve got everything you need to take your store to the next level.