A Step-by-Step Guide on How To Generate PDF Invoices in WooCommerce

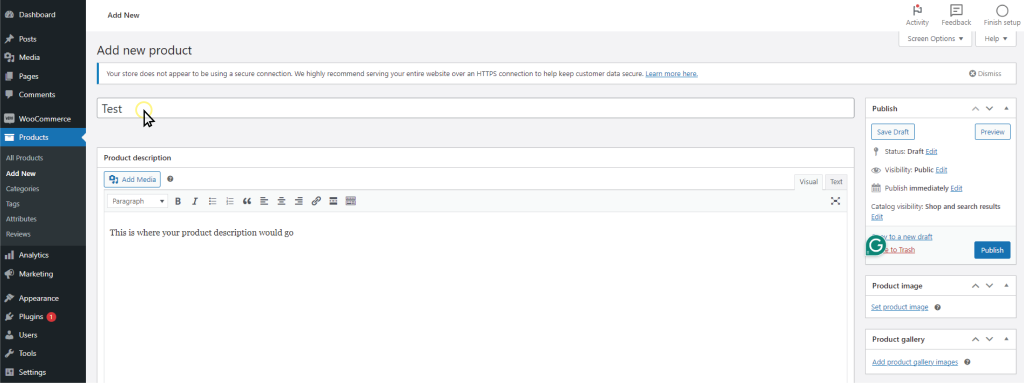
Running a WooCommerce store means keeping things organized, especially when it comes to order documentation. One essential feature many store owners look for is the ability to generate PDF invoices for customer orders automatically.

The problem? WooCommerce doesn’t include this feature by default.

Fortunately, there’s an easy (and free) way to add it by using our 5-star rated plugin:
PDF Invoices & Packing Slips for WooCommerce

In this guide, we’ll walk you through why you need PDF invoices, and exactly how to set them up in minutes.

What Are WooCommerce PDF Invoices?

A PDF invoice is a digital version of a traditional invoice, saved as a PDF file. It includes key order details such as:

  • Customer name and address
  • Order number and date
  • List of purchased items
  • Pricing, taxes, and totals
  • Company contact information

Our PDF Invoices & Packing Slips for WooCommerce plugin provides a standardised, professional document that can be automatically attached to emails or downloaded from the customer’s account page. They’re ideal for both customers and store owners who need a clean, printable record of transactions.

Why Add PDF Invoices to Your WooCommerce Store?

PDF invoices are essential for:

  • Customer expectations: Customers often request a formal invoice, especially for business purchases
  • Legal compliance: Many regions require stores to provide invoices for tax/VAT reporting
  • Order management: Invoices help you stay organised and simplify bookkeeping
  • Professionalism: Automatically sending a neat, branded invoice builds trust

✏️ Note on Taxes: If your store requires tax information on invoices, make sure WooCommerce taxes are properly configured. If taxes aren’t set up, orders (and therefore invoices) will not show tax lines. If you want to learn how to properly configure WooCommerce taxes and display them on your invoice check out our useful guide: Displaying Taxes →

The Easiest Way to Generate PDF Invoices in WooCommerce

You don’t need to code anything or hire a developer. Our free WooCommerce PDF Invoices & Packing Slips plugin makes it simple.

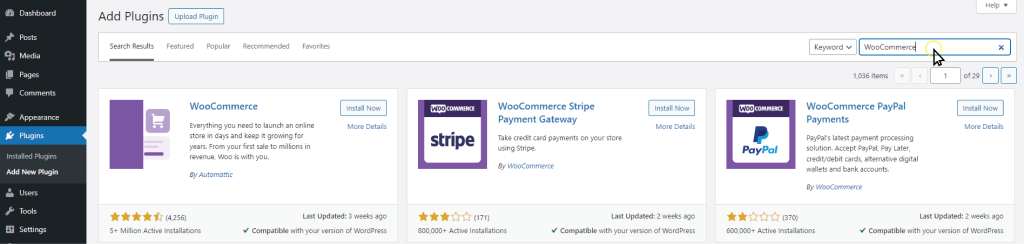
1 Install the Plugin

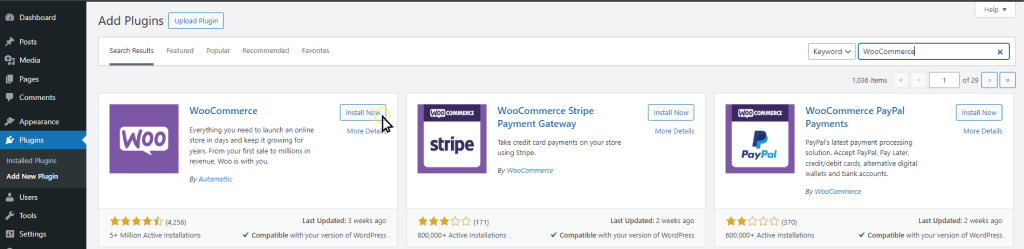
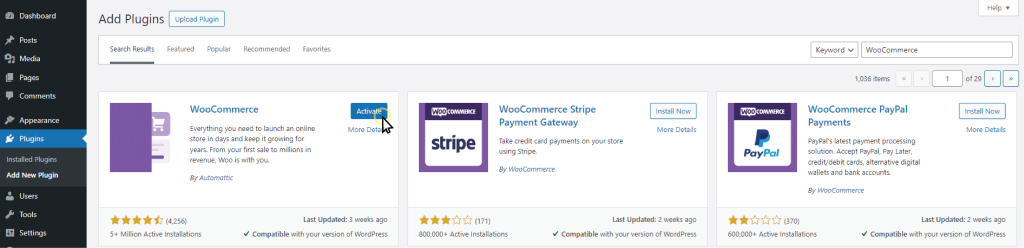
  1. Go to your WordPress dashboard
  2. Navigate to Plugins > Add Plugin
  3. Search for PDF Invoices & Packing Slips for WooCommerce by WP Overnight
  4. Click Install Now, then Activate

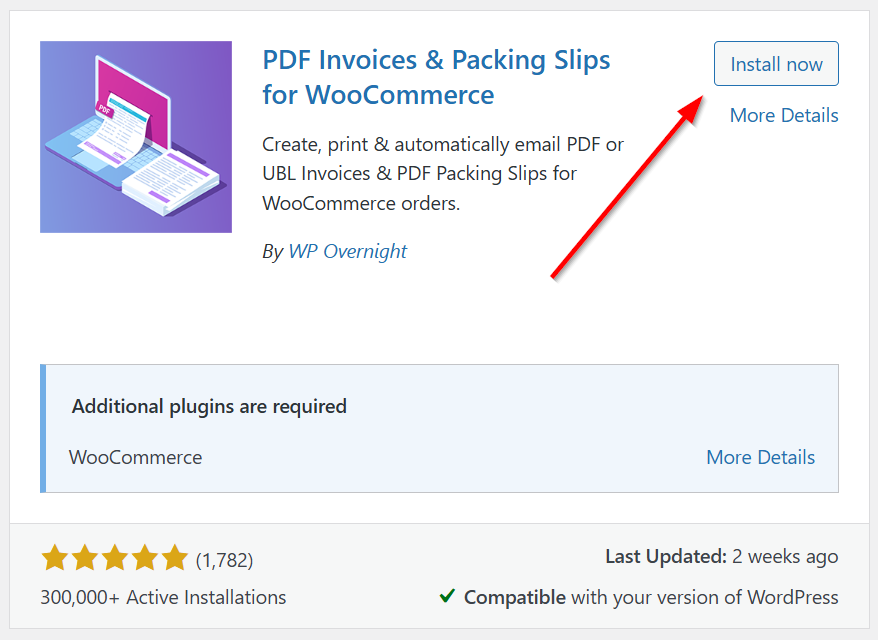
Alternative option: Download our plugin directly from WordPress.org.

Download the Free Plugin

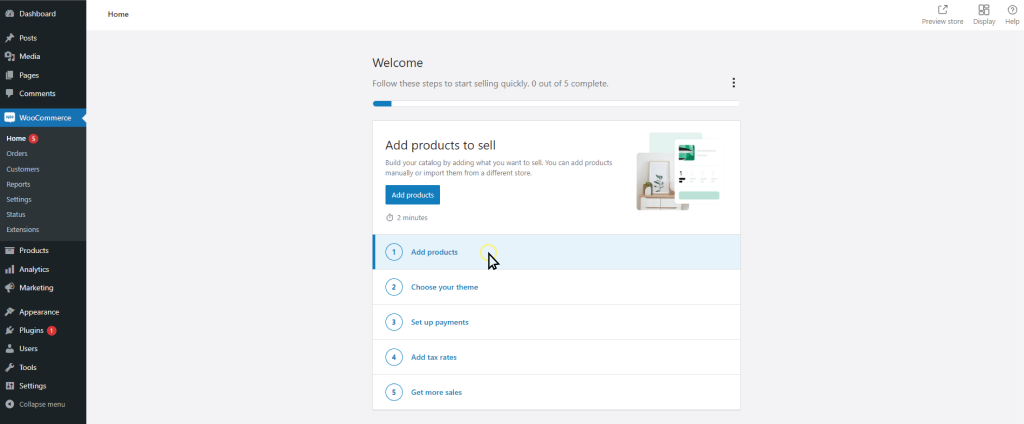
2 Use the Setup Wizard

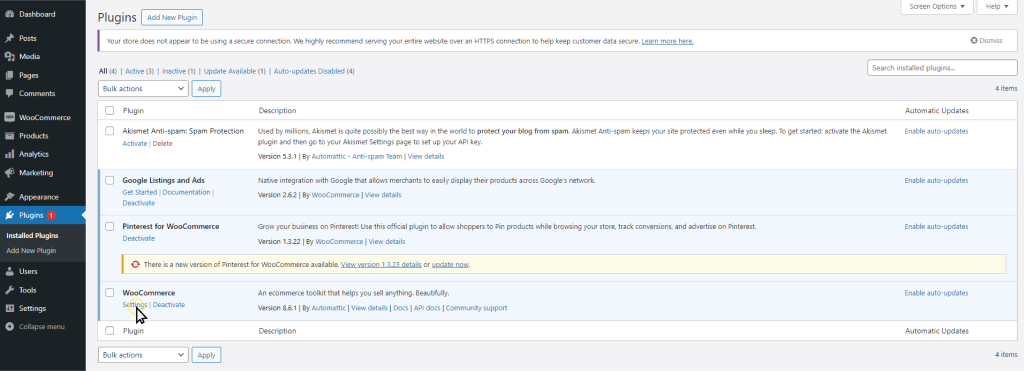
After activating the plugin, go to WooCommerce > PDF Invoices. Here you will see a notice that will lead you to our setup Wizard.

The wizard will guide you through six quick steps, setup takes less than 2 minutes.

  1. Shop Name & Address – Add your business details. These are essential for the invoice to be legally valid.
  2. Logo – Upload your logo to brand the invoice and reinforce store identity.
  3. Attach To Emails – Choose which order emails (e.g. Processing, Completed) the PDF invoice should be attached to.
  4. Display Options – Configure what appears on the invoice:
    • Show shipping address, email address, and phone number
    • Decide how the invoice date and number should be handled
  5. Paper Format – Select A4 or Letter for the PDF layout.
  6. Action Buttons – Choose whether to show quick-access PDF buttons (Invoice & Packing Slip) in the WooCommerce orders list.

💡 Tip: You can launch the Wizard from the plugin settings at any time via WooCommerce > PDF Invoices > Advanced > Tools > Run the Wizard

3 Test the Output

Once set up, you’ll have two ways to view your invoice: using the built-in preview in the plugin settings, or by generating an actual invoice via the ‘Create PDF’ panel on the order page.

Preview

  • Place a test order in your store.
  • Go to WooCommerce > PDF Invoices and see a preview of the invoice in our preview panel.

Generate an invoice

  • Place a test order in your store
  • Go to WooCommerce > Orders and view the order
  • On the right-hand side of the order page, you’ll see a panel labeled Create PDF, where you can click PDF Invoice to generate an invoice for the order

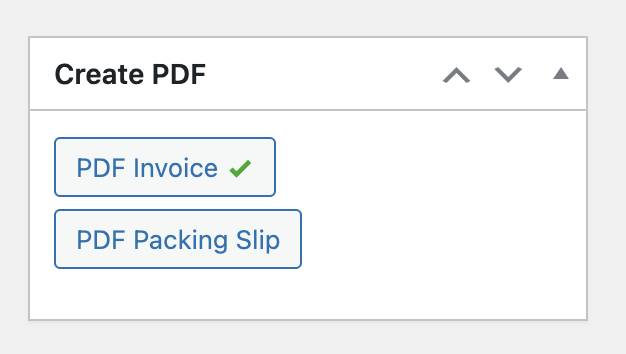
Please note that this approach actually generates an invoice and therefore will consume an invoice number. The green checkmark on the button indicates an invoice has been generated for this order.

Attach to email

If you selected auto-attach while configuring the Wizard (or enabled this via the plugin settings), the PDF invoice will be automatically generated and sent with the selected email(s) (e.g. when the status changes to Completed the invoice is attached to the Completed Order Email).

Bonus: Add Packing Slips and More

This plugin also lets you:

  • Generate packing slips for shipping
  • Print documents in bulk from the order screen
  • Use custom templates or translations

Digging Deeper

The setup wizard gets you started quickly, but if you want to fine-tune your setup or customise documents more deeply, head over to WooCommerce > PDF Invoices in your WordPress admin.
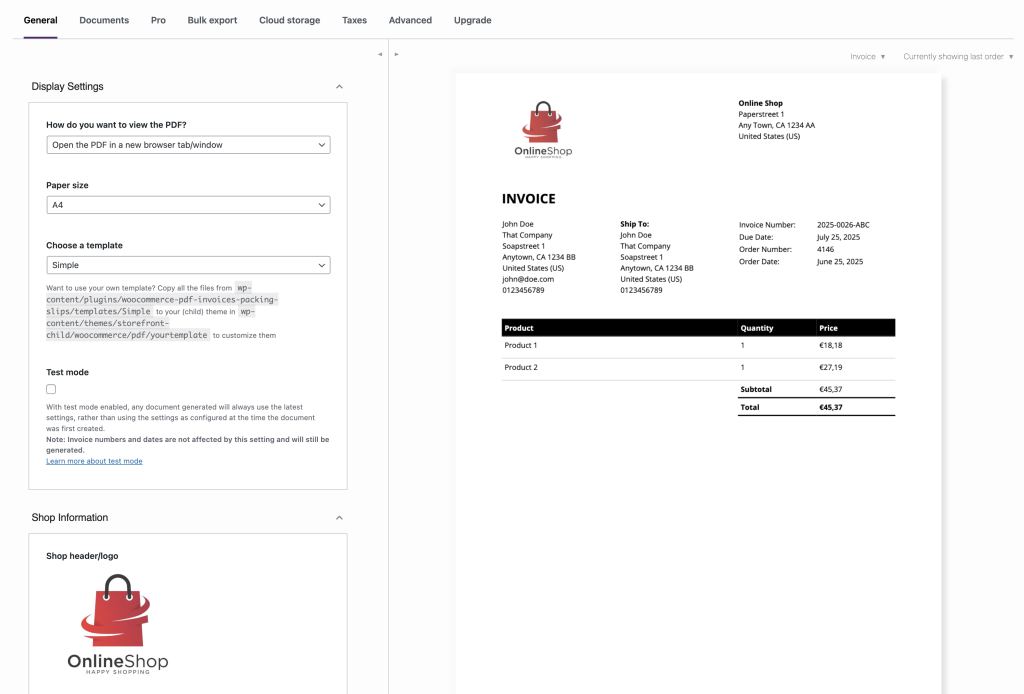
General Settings

This section controls how your documents are styled and displayed. You can:

  • Use our built-in Simple template or create your own custom template. The latter requires a bit of coding knowledge. If you want to edit your template without any coding, upgrade to our PDF Invoices & Packing Slips for WooCommerce Plus Bundle. This includes a drag-and-drop document customizer.
  • Enable test mode, change paper size, and adjust currency symbol support
  • Upload your logo and set dimensions (e.g., “3cm”)
  • Add/edit key business details (shop name, VAT number, address, etc.)
  • Use font subsetting for smaller PDF sizes

Documents Tab

Here you can configure anything that is document specific:

  • Choose which emails invoices attach to (e.g., new order, processing, completed)
  • Hide or show fields like customer phone, notes, and shipping address
  • Customise invoice number format (prefixes, suffixes, and padding)
  • Enable invoice access in the My Account area
  • Reset invoice numbers yearly

Unlock More Power with our Plus Bundle

If your store needs more flexibility or advanced features, the PDF Invoices & Packing Slips Plus Bundle is what you need. This bundle includes two extensions that supercharge the free plugin, adding many powerful features such as:

  • Credit Note support: Essential if you handle refunds and need to issue official credit notes
  • Save to external storage: Automatically save PDFs to Dropbox, Google Drive, or FTP for backups
  • Bulk export: Export all invoices at the end of the month or quarter for accounting
  • PDF Customizer: Add custom fields, tweak layout, and include extra order details — all without touching code

You can upgrade to the Plus Bundle easily by visiting our shop: WooCommerce PDF Invoices & Packing Slips for WooCommerce Plus Bundle →

Final Thoughts

Adding PDF invoices to your WooCommerce store doesn’t have to be difficult or expensive. With just a few clicks, you can automatically generate professional, branded invoices for every order.

Whether you’re selling digital downloads, physical products, or subscriptions, this is one of the easiest ways to improve customer satisfaction and stay compliant.

🎉 Click here to download the free plugin and get started

If you ever need more features or want to explore additional plugins that work seamlessly with the PDF Invoices plugin, simply visit the Upgrade tab in the plugin settings via WooCommerce > PDF Invoices > Upgrade.


WP Overnight is the team behind some of the most trusted WooCommerce plugins used by over 500,000 stores worldwide. Our tools are designed to make your store run smarter, faster, and easier.

How Small WooCommerce Stores Can Compete with Amazon

Are you running a WooCommerce store and feeling overshadowed by giants like Amazon? You’re not alone. The good news is you’re not powerless either. With a few strategic moves, small online stores can punch well above their weight. In this post, we’ll show you how to carve out your niche and build a loyal customer base that keeps coming back.

Focus on Specialisation, Not Scale

You won’t beat Amazon on size, speed, or sheer product variety, and you don’t need to. What you can do is offer depth where they offer breadth. By narrowing your focus to a specific niche, you can build credibility, attract a dedicated customer base, and position yourself as the go-to expert in that space.

  • Choose a niche you understand and care about.
  • Curate a product range that solves specific problems.
  • Offer guidance and support that generic marketplaces can’t match.

PRO TIP: Use your About page and product descriptions to share your story and build trust. Customers love buying from real people.

Make Support a Superpower

When something goes wrong with a big-box order, customers often end up lost in a maze of automated replies. This is your opportunity. Personalised, responsive support is one of the most powerful tools you have. Be available, be human, and go the extra mile – it’s often the difference between a one-time sale and a lifelong customer.

  • Be fast, human, and helpful.
  • Use WooCommerce Smart Reminder Emails to follow up proactively.
  • Offer a live chat or easy-to-use contact form.

PRO TIP: Turn FAQs into blog posts. Not only does this help customers, it boosts your SEO too.

Get Personal with Email and Marketing

Big retailers send bland, bulk emails. You can do better. Your email list is a direct line to your most engaged customers. Use it to send helpful updates, exclusive offers, and behind-the-scenes content. Don’t stop there, bring your story to life with video.

Social media gives you a chance to show your face and your process. Create TikTok videos of your products being built or packaged. Share Instagram Stories highlighting your workspace or featuring a new arrival. These aren’t just marketing tactics, they’re trust builders.

  • Use WooCommerce Smart Reminder Emails to send helpful nudges (abandoned carts, back-in-stock alerts).
  • Personalise product suggestions based on past purchases.
  • Segment your customers based on interest, location, or order history.

PRO TIP: Use your email footer to promote your Instagram or community. Let customers see the people and passion behind your store.

Speed and Convenience Still Matter

Amazon has raised the bar for delivery expectations, but you don’t need a warehouse network to keep up. Clear timelines, efficient processes, and a touch of transparency go a long way. Communicate clearly, ship on time, and simplify your backend.

  • Use WooCommerce Automatic Order Printing to save time.
  • Clearly communicate shipping times.
  • Offer click-and-collect or local delivery if it fits.

PRO TIP: Add a WooCommerce Print Order List or address labels to simplify your packing process.

Build Loyalty with Values and Experience

Customers don’t just buy products, they buy into people, missions, and experiences. Where Amazon is faceless, your store can be personal. Use that to your advantage by leaning into your values. Highlight what matters to you and reflect that in every part of your store experience.

  • Share your values through your website and emails.
  • Highlight eco-packaging, local sourcing, or charitable initiatives.
  • Reward loyalty with small surprises or a thank-you note.

PRO TIP: Use WooCommerce PDF Invoices & Packing Slips to add personalised messages or discount codes inside every parcel.

You’re Not Amazon, and That’s a Good Thing

You don’t need to mimic Amazon to succeed—you just need to do what they can’t. Focus on connection, personal service, and thoughtful branding. With the right WooCommerce tools and a clear identity, you can create an experience that customers remember, love and return to.

How to Add Shipping Tracking in WooCommerce (Custom Code)

Adding shipping tracking to your WooCommerce store helps improve customer satisfaction by keeping customers informed about their orders. In this guide, we’ll walk you through how to manually add shipping tracking functionality using custom code, with a quick alternative using plugins if coding isn’t your preference.

Step 1: Add Tracking Number Field to WooCommerce Orders

First, let’s add a simple field to include tracking numbers on the WooCommerce order editing screen:

add_action('woocommerce_admin_order_data_after_shipping_address', 'wpo_add_custom_tracking_field');
function wpo_add_custom_tracking_field($order){
    woocommerce_wp_text_input([
        'id' => 'tracking_number',
        'label' => 'Tracking Number:',
        'value' => get_post_meta($order->get_id(), 'tracking_number', true)
    ]);
}

Note: This snippet adds the tracking number field to the backend, but you also need to save this data to the order’s metadata for it to be usable. To do this, you’ll need to add another snippet to your site, which will save the entered tracking numbers to the order meta (Step 2)

Step 2: Save Your Tracking Numbers

To make the tracking number added by the store owner available for display, you need to save it in the order meta data. After adding this snippet, you can enter the tracking number on the order editing page in the custom field we created (in step 1) and click ‘Update’ to save the changes. Once saved, the tracking number becomes available for display on the customer’s account page and order emails.

add_action('woocommerce_process_shop_order_meta', 'wpo_save_tracking_custom_field');
function wpo_save_tracking_custom_field($order_id){

    update_post_meta($order_id, 'tracking_number', sanitize_text_field($_POST['tracking_number']));

}

Step 3: Display Tracking on Customer Account Pages

To display tracking numbers to customers on their order details page, use the following code snippet:

add_action('woocommerce_order_details_after_order_table', 'wpo_display_tracking_number_customer');
function wpo_display_tracking_number_customer($order) {

    $tracking_number = get_post_meta($order->get_id(), 'tracking_number', true);
    if (!empty($tracking_number)) {
        echo '<p><strong>Tracking Number:</strong> ' . esc_html($tracking_number) . '</p>';
    }

}

Step 4: Include Tracking in Order Confirmation Emails

Ensure your customers receive their tracking numbers via confirmation emails:

add_action('woocommerce_email_after_order_table', 'wpo_email_custom_tracking', 10, 4);
function wpo_email_custom_tracking($order, $sent_to_admin, $plain_text, $email) {

    $tracking_number = get_post_meta($order->get_id(), 'tracking_number', true);
    if (!empty($tracking_number)) {
        echo '<p>Your tracking number: ' . esc_html($tracking_number) . '</p>';
    }

}

PRO TIP: Always test custom snippets on a staging site first! Need guidance? Check our tutorial on how to add custom code to your WooCommerce website.

Prefer a Plugin? Here are Alternatives

If coding isn’t your thing, consider these user-friendly plugins:

Installation:

  • Navigate to WordPress Dashboard > Plugins > Add New.
  • Search, install, and activate your preferred plugin.
  • Configure it under WooCommerce > Settings > Shipping or WooCommerce Shipment Tracking Pro > Settings.

Optional Integration: PDF Invoices

Streamline your workflow further by adding tracking numbers to your invoices and packing slips with our WooCommerce PDF Invoices & Packing Slips plugin.

Step 4: Monitor Shipping Effectively

Regularly review tracking statuses on your WooCommerce orders dashboard to proactively manage shipments and enhance customer satisfaction.

PRO TIP: Regular checks help you quickly address issues and ensure smooth delivery experiences.

Conclusion

Whether you prefer coding or plugins, adding shipping tracking in WooCommerce enhances customer experience and simplifies your store management.

Check out our other plugins and blog posts to further enhance your WooCommerce store!

How to Automatically Print WooCommerce Orders

Running a WooCommerce store means processing orders efficiently and manual printing can be a hassle and time consuming. Wouldn’t it be great if your WooCommerce orders could be printed automatically as they come in or at key stages of your fulfilment process?

This guide will show you how to set up automatic printing using PrintNode and our WooCommerce Automatic Order Printing Plugin.

Why Automate Order Printing?

Automating order printing isn’t just about convenience, it has tangible benefits for your business. Here’s why you should consider it:

  1. Saves Money: By reducing manual tasks, you free up staff to focus on more valuable work instead of printing, sorting, and handling unnecessary paperwork. Fewer errors also mean less waste in reprints and incorrect shipments, saving on paper, ink, and lost revenue due to mistakes.
  2. Happier Staff and Customers: Employees benefit from a streamlined process that reduces stress and improves efficiency. Customers receive their orders faster and with greater accuracy, leading to a better shopping experience and increased customer satisfaction.
  3. Reduces Errors: Manually printing orders can lead to mistakes such as missing orders or incorrect print formats. Automating the process ensures every order is printed correctly, reducing costly fulfilment errors.
  4. Faster Order Processing: Orders are instantly printed the moment they are marked as completed, meaning your fulfilment team can act on them immediately, reducing wait times and improving operational efficiency.
  5. Improved Workflow for High Volume Stores: If you handle a large number of orders, automation prevents bottlenecks caused by manual printing delays. Whether you operate a warehouse, retail store, or restaurant, automatic printing keeps everything running smoothly.

What You Need

To set up automatic printing, you’ll need:

  1. PrintNode Account – A cloud printing service that connects your printer to WooCommerce. Sign up for either a free or paid plan based on your printing needs.
  2. WooCommerce Automatic Order Printing Plugin – Our plugin that seamlessly integrates PrintNode with WooCommerce, allowing you to automate order printing effortlessly.
  3. A Compatible Printer – Any printer connected to your computer or network.

Step 1: Set Up Your PrintNode Account

  1. Visit PrintNode and sign up for an account.
  2. Install the PrintNode client software on the computer connected to your printer.
  3. Log in to PrintNode and ensure your printer is detected.
  4. Print a test page from the PrintNode dashboard to verify connectivity.

PRO TIP: Ensure your printer is always online for uninterrupted automated printing.

Step 2: Install and Configure Our WooCommerce Print Plugin

  1. In your WordPress dashboard, go to Plugins > Add New
  2. Upload WooCommerce Automatic Order Printing and install it.
  3. Activate the plugin.

Step 3: Configure Automatic Printing for Completed Orders

  1. In your WordPress dashboard, go to WooCommerce > PrintNode > Settings and enter your PrintNode API key.
  2. Go to WooCommerce > PrintNode > Printers and select the printers you want to use.
  3. In the WooCommerce > PrintNode > Settings page, choose which print-outs to send when an order is completed (e.g: invoices, packing slips, receipts).
  4. Save your settings.

Now, whenever an order is marked as Completed, it will automatically print!

PRO TIP: You can customize the print layout by modifying the plugin’s template files.

Step 4: Test Your Setup

  1. Place a test order in your WooCommerce store.
  2. Mark the order as Completed in WooCommerce.
  3. Check if the order prints automatically.

If it doesn’t, check:

  • The PrintNode client is running.
  • The API key is correctly entered.
  • Your printer is connected and selected in the plugin settings.

Bonus: Adjusting Print Timing

If you prefer to print at a different stage (e.g., when an order is placed instead of completed), you can modify this setting in WooCommerce > PrintNode > Settings by selecting the relevant trigger.


Conclusion

Automating WooCommerce order printing streamlines your workflow and eliminates manual tasks. With PrintNode and our WooCommerce Automatic Order Printing Plugin, you can ensure orders print instantly when completed, saving you time and improving efficiency.

Need more automation? Check out our other WooCommerce plugins to optimize your store! If you need help setting up automatic printing, contact our support team or visit our documentation for troubleshooting tips.

How to Add Custom Code to Your WooCommerce Website (Without Breaking It)

Want to customize your WooCommerce store but aren’t sure where to add custom code? Whether it’s tweaking the design with CSS, adding JavaScript for dynamic behaviour, or modifying functionality with PHP, we’ll cover the right way to do it—without breaking your site.

Where to Add Custom Code in WordPress & WooCommerce

WooCommerce customization usually involves three types of code:

  • CSS – Styles your site (colors, fonts, spacing, layouts).
  • JavaScript (JS) – Adds dynamic behaviour (e.g: show/hide elements, popups, live updates).
  • PHP – Modifies core functionality (e.g: checkout behaviour, product display logic).

Let’s look at the best places to add them.

1. Adding Custom CSS

Best for: Changing colors, layouts, fonts, button styles, etc.

Where to Add CSS Code

  • Theme Customizer (Recommended)
    • Go to Appearance → Customize → Additional CSS and paste your styles.
  • Child Theme’s style.css
    • If you’re using a child theme, place your CSS in: wp-content/themes/your-child-theme/style.css
Example: Changing the Add to Cart Button Color
.woocommerce button.button {
    background-color: #ff6600;
    color: white;
}

2. Adding Custom JavaScript

Best for: Dynamic features like interactive menus, popups, and live updates.

Where to Add JavaScript Code

function wpo_custom_scripts() {
    wp_enqueue_script('wpo-custom-js', get_stylesheet_directory_uri() . '/custom.js', array('jquery'), null, true);
}
add_action('wp_enqueue_scripts', 'wpo_custom_scripts');

Then place your JS code in custom.js inside the child theme.

PRO TIP: Loading JavaScript in the footer (true in wp_enqueue_script) improves page speed because it prevents scripts from blocking the loading of the page’s main content. This means your website will appear faster to users, and search engines favor sites that load quickly.

Example: Hide the Price for Out-of-Stock Products
jQuery(document).ready(function($) {
    $('.stock.out-of-stock').closest('.product').find('.price').hide();
});


3. Adding Custom PHP

Best for: Adding new features, modifying WooCommerce behavior, creating hooks.

Where to Add PHP Code

  • Code Snippets Plugin (Recommended)
  • Child Theme’s functions.php
    • If you’re using a child theme, add PHP code to functions.php. Avoid modifying the parent theme, or updates will erase your changes.
Example: Add a Custom Text After the Price
add_filter('woocommerce_get_price_html', 'wpo_add_custom_price_text');
function wpo_add_custom_price_text($price) {
    return $price . ' <span style="color: red;">(Limited Offer!)</span>';
}

PRO TIP: Test PHP code in a staging environment before applying it to your live site.


4. How to Add Custom CSS & JS in Popular Themes (Bonus)

If you’re using a common theme like Astra, Divi, Elementor, Bricks, GeneratePress, or Kadence, here’s how to inject your code:

Astra

  • CSS: Customizer → Additional CSS
  • JS: Customizer → Custom Layouts → Hooks (Or use Code Snippets)

Divi

  • CSS: Divi → Theme Options → Custom CSS
  • JS: Divi → Theme Options → Integration (Add scripts body)

Elementor

  • CSS: Site Settings → Custom CSS
  • JS: Elementor → Custom Code (Pro Feature)

Bricks

  • CSS: Bricks → Custom CSS
  • JS: Bricks → Custom JavaScript

GeneratePress

  • CSS: Customize → Additional CSS
  • JS: Elements → Hook → wp_footer

Kadence

  • CSS: Customize → Additional CSS
  • JS: Kadence → Custom Scripts

Conclusion

Adding custom code to WooCommerce is a powerful way to enhance your store, as long as you do it the right way.

Best Practices Recap:

  • Use Theme Customizer for CSS
  • Use Code Snippets Plugin for PHP & JS
  • Use a Child Theme for permanent changes
  • Always test in a staging environment first

We hope this helps you make awesome sites better!

WooCommerce Order Fulfillment: Tips and Best Practices

Did you know that 78% of frequent online shoppers say fast shipping is one of the biggest factors in a positive shopping experience? In the world of WooCommerce, getting an order from checkout to the customer’s doorstep quickly and efficiently is crucial for retaining happy customers and growing your business.

A seamless order fulfillment process ensures that orders are accurately processed, efficiently packed, and quickly shipped. In this guide, we’ll cover the essential steps and best practices to optimize your WooCommerce order fulfillment workflow.

1 Streamline Your Order Processing Workflow

A well-structured order processing system can reduce errors and speed up fulfillment. Here’s how to optimize it:

  • Automate Order Management: Use WooCommerce plugins to automatically update order statuses and notify your team when action is needed.
  • Set Up Automatic Order Printing: Tools like WooCommerce Automatic Order Printing can print invoices and packing slips as soon as an order is placed, reducing manual work.
  • Integrate With Shipping Providers: Connect your store to shipping carriers like USPS, FedEx, or DHL for real-time rates and label printing.

PRO TIP: Use WooCommerce Smart Reminder Emails to send order confirmations and updates to customers, keeping them informed at every stage.

2 Maintain Optimal Inventory Management

Nothing frustrates customers more than placing an order, only to find out later that the item is out of stock. Implement these best practices:

  • Use Inventory Management Plugins: Automate stock updates with tools like WooCommerce Stock Manager or ATUM Inventory Management.
  • Set Up Low-Stock Alerts: Get notified when inventory levels are low to reorder in time.
  • Sync Inventory Across Multiple Sales Channels: If you sell on multiple platforms, ensure all inventory is updated in real time.

PRO TIP: Utilize WooCommerce Batch Numbers to track product batches and ensure accurate stock levels especially if you sell food or supplements.

3 Improve Packing and Shipping Efficiency

Packing orders quickly and accurately is key to avoiding delays and customer complaints. Here’s how to optimize this step:

PRO TIP: If you handle bulk orders, consider using WooCommerce Bulk Order Form to streamline order entry and fulfillment.

4 Enable Order Tracking and Customer Communication

Providing customers with real-time tracking updates builds trust and reduces support inquiries. Best practices include:

  • Send Automated Tracking Emails: Use WooCommerce tracking plugins to send real-time shipping updates.
  • Offer Self-Service Order Tracking: Customers should be able to check their order status directly on your site.
  • Use SMS Notifications: Some customers prefer text updates, which can increase engagement and satisfaction.

PRO TIP: The WooCommerce Postcode Checker (which now works in the EU) helps customers confirm shipping eligibility before they place an order, preventing fulfillment issues.

5 Optimize Returns and Customer Support

A smooth return process encourages repeat purchases and increases customer loyalty. Here’s how to handle returns effectively:

  • Clearly Define Return Policies: Make sure return terms are easy to find on your site.
  • Offer Prepaid Return Labels: This simplifies the return process for customers.
  • Automate Refund Processing: WooCommerce has built-in features to handle refunds quickly.

PRO TIP: Use WooCommerce Smart Reminder Emails to send follow-ups and request reviews after order completion.

Final Thoughts

WooCommerce order fulfillment doesn’t have to be a headache. By optimizing your workflow from order processing to shipping and tracking, you can create a seamless experience that keeps customers coming back.

Start implementing these best practices today and watch your fulfillment process become faster, more efficient, and more reliable!

How to Create a WordPress Child Theme (Step-by-Step Guide)

Creating a WordPress child theme is the best way to customise your website while keeping the parent theme’s updates and functionality intact. Whether you’re tweaking styles, adding new features, or modifying templates, a child theme gives you full control without risking your changes being overwritten.

What is a WordPress Child Theme?

A child theme is a sub-theme that inherits all the functionality, styling, and features of another theme, called the parent theme. The main advantage of using a child theme is that it allows you to modify your site without affecting the original theme’s code. This means you can safely update the parent theme without losing your customisations.

Think of it this way: A child theme is like adding a body kit to your car. The car is your parent theme – it works perfectly as it is. The body kit (child theme) lets you make it unique without changing the car’s core functionality.

When Should You Use a Child Theme?

If you’re making any modifications to a theme, a child theme is the way to go. Here’s when you should definitely use one:

  • Customising CSS styles without using additional plugins.
  • Modifying template files (e.g., single.php, header.php).
  • Adding new functionality via functions.php.
  • Overriding parent theme settings safely.
  • Avoiding theme updates erasing your changes.

If you’re just making small CSS changes, you might be fine using the WordPress Customizer or Additional CSS option, but for anything beyond that, a child theme is the best approach.

How to Make a WordPress Child Theme (Step by Step)

Creating a child theme is easy. Follow these steps to set it up:

1 Create a Child Theme Folder

  1. Access your site’s files via FTP or File Manager.
  2. Navigate to wp-content/themes.
  3. Create a new folder and name it logically, e.g., yourtheme-child.

2 Create a Stylesheet (style.css)

Inside the child theme folder, create a style.css file and add the following:

/*
 Theme Name: YourTheme Child
 Template: yourtheme
 Author: Your Name
 Description: A child theme for YourTheme
 Version: 1.0
*/

PRO TIP: The Template name must match the exact name of the parent theme’s folder, or the child theme won’t work!

3 Create a Functions File (functions.php)

Next, create a functions.php file in the child theme folder and add this code to properly enqueue styles:

<?php
function my_child_theme_enqueue_styles() {
    $parent_style = 'parent-style';
    wp_enqueue_style($parent_style, get_template_directory_uri() . '/style.css');
    wp_enqueue_style('child-style', get_stylesheet_directory_uri() . '/style.css', array($parent_style), wp_get_theme()->get('Version'));
}
add_action('wp_enqueue_scripts', 'my_child_theme_enqueue_styles');
?>

Why this step? This ensures your child theme loads both its own styles and the parent theme’s styles correctly.

4 Activate Your Child Theme

  1. Go to Appearance > Themes in your WordPress dashboard.
  2. Find your newly created child theme.
  3. Click Activate.

That’s it! Your child theme is now active, and any modifications you make will override the parent theme without being lost during updates.

What Can You Do with a Child Theme?

Now that your child theme is up and running, here’s what you can customise:

  • Modify CSS Styles – Add custom styles in style.css.
  • Edit Theme Templates – Copy and modify files like header.php, footer.php, or single.php from the parent theme.
  • Add Custom Functions – Extend functionality by adding custom PHP code to functions.php.
  • Create Custom Templates – Build unique layouts for pages or posts.

PRO TIP: Always copy files from the parent theme before modifying them to ensure they remain functional.

Final Thoughts

Using a child theme is a must for anyone customising a WordPress theme. It keeps your changes safe, lets you update the parent theme without worry, and provides a flexible way to modify your website.

If you’re running a WooCommerce store, using a child theme can help tweak templates and improve the checkout experience without risking core functionality.

Beginner’s guide: How to set up and manage a WooCommerce store

Picture this: an online store that practically runs itself, leaving you free to focus on growth. Sounds like a dream, doesn’t it? Welcome to the world of WooCommerce. Building and managing your online store is easier than you might think.

WooCommerce, for those unfamiliar, is a powerful e-commerce platform built specifically for WordPress websites. It empowers entrepreneurs like you to create, customise, and scale your online stores with ease. In this beginner guide, we’ll walk you through every step of the WooCommerce journey, from setting up your store to maximising your sales and more. 

Let’s dive in:

Section 1: Getting started with WooCommerce

1. Choose a hosting service and install WooCommerce

Selecting the right hosting provider lays the foundation for your WooCommerce store’s performance and reliability. Follow these steps to choose hosting and install WooCommerce:

Step 1: Sign up with a hosting provider

Start by researching reputable hosting providers that offer WordPress hosting services. Look for providers known for their reliability, performance, and customer support. Consider factors like server resources, uptime guarantees, scalability, and support for WooCommerce. Once you’ve chosen a hosting provider, sign up for a hosting plan that aligns with your needs. Follow the provider’s instructions to create an account and purchase a hosting plan.

Step 2: Install WordPress

Most hosting providers offer easy one-click installations for WordPress. Log in to your hosting account’s control panel (often cPanel or a similar interface) and locate the WordPress installation option. Follow the on-screen instructions to install WordPress on your domain. You may need to choose a domain name, directory, and provide administrative details for your WordPress site.

Step 3: Install WooCommerce

After installing WordPress, access your WordPress dashboard by navigating to your domain’s URL followed by “/wp-admin” (e.g. yourdomain.com/wp-admin).

Once logged in, go to the “Plugins” section and click on “Add New.”

Search for “WooCommerce” in the search bar.

Click “Install Now” next to the WooCommerce plugin.

After installation, click “Activate” to activate the plugin.

Congratulations! You’ve now installed WooCommerce on your WordPress site. Let’s move on to setting up your store.

2. Set up your store

Now that WooCommerce is installed, it’s time to set your store settings, add products, and set up payment gateways. Follow these steps to get your store up and running:

Step 1: Adjust basic settings

Navigate to the WooCommerce settings page in your WordPress dashboard.

Review and configure basic settings such as currency, location, shipping, and tax options. Customise settings according to your store’s requirements.

Step 2: Add products

To add a new product, go to the “Products” tab in your WordPress dashboard and click on “Add Product.”

Enter the product’s name, description, price, and other relevant details.

Upload product images and assign categories and tags to organise your products.

Configure product variations, if applicable, such as size, colour, or quantity options.

Once done, click “Publish” to make the product live on your store.

Step 3: Set up payment gateways

WooCommerce offers various payment gateway options to accept payments from customers. Navigate to the “WooCommerce” > “Settings” > “Payments” tab to configure payment gateways. Choose from available payment gateways such as PayPal, Stripe, Square, or offline methods like bank transfer or cash on delivery.

Adjust your payment gateway settings, such as your account details.

Test the payment gateways to ensure they’re functioning correctly before launching your store.

Your WooCommerce store is all set up and ready to start taking orders. In the next sections, we’ll dive into managing your store, boosting sales, and exploring more features to improve your e-commerce experience.

Section 2: Organise your products with categories:

Creating categories helps organise your products and makes navigation easier for customers. To create a new category, go to “Products” > “Categories” in your WordPress dashboard. 

Enter a name for the category and add a description if necessary. Tags can also be added while creating or editing a product. They provide additional information about the product and help users find related items. Properly categorising and tagging products encourages people to explore your store.

Section 3: Optimise your store for sales

Step 1: Choose a Theme

Select a WooCommerce-compatible theme that aligns with your brand aesthetic and provides the customisation options you need. You can browse through the available themes in the WordPress theme section on your dashboard or explore third-party marketplaces for premium themes.

Step 2: Customise colours and fonts

Navigate to the theme customisation settings in your WordPress dashboard to modify these elements.

Step 3: Add your logo and branding

Upload your logo and customise other branding elements such as header images, backgrounds, and icons. These visual elements help establish brand recognition and create a cohesive brand experience for your customers.

Step 4: Optimise your product pages

Add high-quality product images, detailed descriptions, pricing information, and clear call-to-action buttons. Consider implementing product zoom functionality or image galleries to showcase your products effectively.

Step 5: Add widgets and sidebars

Customise your website layout by adding widgets and sidebars to display additional content or features. Popular widgets include product search bars, product categories, recent posts, social media feeds, and newsletter sign-up forms. 

Section 4: Manage your orders and customers:

Processing orders

Viewing orders: 

Navigate to the Orders section in your WooCommerce dashboard to view a list of all orders received on your store. You can filter orders by status, date, or customer, making it easy to locate specific orders.

Managing order status: 

WooCommerce provides several order statuses, including Pending, Processing, Completed, On-Hold, Cancelled, and Refunded. You can update the status of an order based on its progress, such as when it’s being processed, shipped, or delivered.

Updating tracking information: 

For orders that require shipping, you can add tracking information to keep customers informed about the status of their delivery. WooCommerce allows you to enter tracking numbers and shipping carriers directly from the order details page.

Adding order notes: 

Communicate important information with customers by adding order notes. Whether it’s notifying them of a delay, requesting additional information, or providing updates on their order status, order notes help keep customers informed and engaged.

Expert tip – If you want to automate some of the process, the WooCommerce Smart Reminder Emails plugin can help. It automatically sends emails to your customers like payment reminders or follow ups.

Section 5: Enhance your store with plugins:

WooCommerce plugins are powerful tools that can expand on what your online store can do. Whether you’re looking to streamline store management, improve your customer experience, or boost sales, there’s a plugin available to help you achieve your goals. From adding new features to customising existing ones, WooCommerce plugins offer endless possibilities for optimising your store.

Here are some of our top recommendations:

1. WooCommerce PDF Invoices & Packing Slips Professional

This plugin simplifies the process of generating professional invoices and packing slips for your orders. With customisable templates and automatic generation, you can create branded documents that reflect your store’s identity. Additionally, features like email/print/download options and bulk exporting make managing invoices a breeze, saving you time and effort.

2. WooCommerce Customer Manager

Keep track of your customers and their orders with ease. Manage customer information, view order history, and track customer interactions to provide a personalised service for each customer.

3. WooCommerce Opening Hours

Display your store’s opening hours on your website. Customise opening and closing times for each day of the week, and automatically display whether your store is open or closed to customers.

4. WooCommerce EU/UK VAT Compliance

Ensure compliance with EU and UK VAT regulations for your WooCommerce store. Automatically calculate and apply VAT rates based on customer location, and generate VAT-compliant invoices for hassle-free tax reporting.

5. Menu Cart Pro

Enhance your website’s navigation and shopping experience with a customizable cart menu. Display cart contents, total amount, and checkout options in a sleek and intuitive dropdown menu, improving accessibility and encouraging conversions.

Section 6: Track your store’s performance

Use WooCommerce’s built-in analytics: 

Take advantage of the analytics features built into WooCommerce. These tools provide valuable insights into your store’s performance, including sales trends, customer behaviour, and popular products. Navigate to your WooCommerce dashboard and explore the available reports under the “Analytics” section.

Install an analytics plugin: 

Consider installing additional analytics plugins to complement WooCommerce’s built-in features. Plugins like Google Analytics for WordPress or MonsterInsights can provide more detailed metrics and customizable reports. Follow the installation instructions provided by the plugin developer and connect your store to your preferred analytics platform.

After following all of these steps, you should have a fully functional online store! Now you can focus on making more sales and keeping your customers happy. 

Here are some extra tips to make your online store even better:

Encourage and monitor product reviews:

Product reviews are important for gaining trust and boosting sales. Encourage happy customers to leave reviews by sending follow-up emails or offering discounts. Make it easy for customers to leave reviews on your product pages. Respond quickly to reviews, both good and bad. You can send WooCommerce follow up emails to automatically ask customers to review their purchases. This helps gather feedback and build credibility.

Provide support: 

Offer multiple channels for customers to reach out for support, such as email, live chat, or phone support. Make sure your support team is knowledgeable, friendly, and equipped to assist customers with their queries or problems.

Reward loyalty: 

Add a loyalty program to reward repeat customers and encourage future purchases. Offer discounts, exclusive offers, or loyalty points for every purchase made, motivating customers to return to your store. You can use a plugin to automatically generate coupons for customers to use on their next purchase.

Set up conversion tracking: 

Conversion tracking allows you to monitor specific actions that lead to sales or other desired outcomes on your website, such as completing a purchase or signing up for a newsletter. Add conversion tracking to your analytics tools to measure the effectiveness of your marketing campaigns.

Monitor traffic sources: 

Keep an eye on where your website traffic is coming from. Are visitors finding your store through organic search, social media, paid ads, or other channels? Understanding your traffic sources can help you improve your marketing strategies and allocate resources more effectively.

Analyse customer behaviour: 

Dive deep into customer behaviour data to understand how visitors interact with your store. Look for patterns in browsing behaviour, product views, add-to-cart actions, and checkout behaviour. Identify any pain points or barriers that may be stopping conversions and take steps to address them.

Experiment: 

Don’t be afraid to experiment with different strategies and tactics to improve your store’s performance. A/B testing, for example, allows you to compare the effectiveness of different website elements or marketing campaigns. Continuously monitor the results of your experiments and adjust based on what works best for your store.

Stay informed: 

Keep yourself updated on the latest trends and best practices in e-commerce analytics. Follow industry blogs, attend webinars, and join online communities to learn from other merchants and experts in the field. Stay curious and proactive in seeking out opportunities to optimise your store’s performance.

Conclusion: 

Setting up and managing a WooCommerce store is totally doable for anyone looking to get into online selling. Just follow the steps we talked about, from picking a hosting provider to adding products and sorting out payment options.

Don’t forget to organise your products into categories, spruce up your store’s look to boost sales, and keep an eye on orders and customers. Plus, tracking how your store’s doing is super important for keeping things on track.

Plugins are a great addition to simplify your processes or to add more features to your store. If you’re looking for a set of plugins to get you started, be sure to check out our bundle deals. They’ve got everything you need to take your store to the next level. 

New Upgrade Paths for all our Plugins

We are very excited to announce that all our plugins now include upgrade paths for more licenses or bundles, if available.

If you want to upgrade from a single site license to a 3 or 25 site license you can now do that directly from your account! Whatever you paid for your existing license will be automatically deducted from the upgrade price. Want to get started? Here’s how to upgrade your license in 3 simple steps:

  1. Click here to visit the ‘My Account‘ page.
  2. Scroll down the page until you see the license information section:
    license upgrade details
  3. Click the ‘View Upgrades’ link and follow the steps to upgrade your license
    my account licenses

That’s it!

If you have any questions don’t hesitate to contact us.

WooCommerce Bulk Order Form 2.0 Update

WooCommerce Bulk Order Form 2.0 is here!

After two months of development and testing the latest version is here and there are lots of new things!

  • New: Completely new template for better handling variations.
  • New: Limit product search to a specific category via shortcode.
  • New: Include only a specific set of products globally via the limit products extension or per shortcode.
  • New: Exclude only a specific set of products globally via the limit products extension or per shortcode.

Using The New Templates

WooCommerce Bulk Order Form 2.0 includes a new template, the variation template. With the new template you can now pick between the standard or variation template on the options page.

To choose your new template, navigate to the settings page and select which template you want. Once you hit save, select the ‘Template Settings’ tab and set your options. The forms use the same shortcode, so switching between templates will automatically update the form displayed with the shortcode.

When your customer selects the product field the form will auto-search. Included in version 1.1.3 was a ‘Maximum Items’ setting that limits the number of products that are searched. We highly recommend limiting the number of products to less than 50, but ideally less than 20.

Once an item is selected, if there are no variations the variation field will be disabled. If there is a variation, the variations will be auto searched as soon as the customer clicks the variation field. If you notice anything not working properly, please contact support@wpovernight.com.

Restricting Products by Category

WooCommerce Bulk Order Form 2.0 includes a new feature that allows you to restrict a shortcode to an individual category or group of categories. To use this feature navigate to your bulk order form page and find the [wcbulkorder] shortcode and add the category attribute. Below are a few examples:

Restrict search to products with category id 17
[wcbulkorder category="17"]

Restrict search to products of categories with the id 17 and 28
[wcbulkorder category="17,28"]

Including Products

The latest version of WooCommerce Bulk Order Form includes a feature that allows you to restrict search to only the products you specifically allow or ‘include’. There are two ways to implement this feature. The first is with this extension. The extension limits products site-wide and gives you the ability to check a box to include a specific product in search.

The second method is with a shortcode, and is a better fit for sites who have multiple bulk order forms. To include only specific products via a shortcode use the ‘include’ attribute to add a comma separated list of included ids. Example:

Include Items with the id 12, 27, 92, 114, 115
[wcbulkorder included="12,27,92,114,115"]

Excluding Products

The latest version of WooCommerce Bulk Order Form includes a feature that allows you to exclude products from your bulk order from. There are two ways to implement this feature. The first is with this extension. The extension limits products site-wide and gives you the ability to check a box to include a specific product in search.

The second method is with a shortcode, and is a better fit for sites who have multiple bulk order forms. To exclude only specific products via a shortcode use the ‘exclude’ attribute to add a comma separated list of included ids. Example:

Exclude Items with the id 12, 27, 92, 114, 115
[wcbulkorder excluded="12,27,92,114,115"]

Using the [wcbulkorder] ShortCode

The bulk order form shortcode is designed to be extremely flexible. The following attributes are available for each of the default templates.

  • rows: The rows attribute allows you to customize the number of rows the form will display. You can set a default value on the options page, but can customize it for each bulk order form. The attribute must be a numeric value. Example: [wcbulkorder rows="12"]
  • price: The price attribute determines whether or not the price field is to be displayed and is also set by default on the settings page. However, you can modify it for each form. Set price equal to true to display, or false to hide. Examples: [wcbulkorder price="false"] , [wcbulkorder price="true"]
  • price_label: This attribute defines the text that displays as the label for the price column. This is defined in the default options on the backend but can be changed on a per form basis. Example: [wcbulkorder price_label="Price"]
  • product_label: This attribute defines the text that displays as the label for the product column. This is defined in the default options on the backend but can be changed on a per form basis. Example: [wcbulkorder product_label="Product"]
  • variation_label: (Variation Form Only) – This attribute defines the text that displays as the label for the variation column. This is defined in the default options on the backend but can be changed on a per form basis. Example: [wcbulkorder variation_label="Variation"]
  • quantity_label: This attribute defines the text that displays as the label for the quantity column. This is defined in the default options on the backend but can be changed on a per form basis. Example: [wcbulkorder quantity_label="Quantity"]
  • add_rows: The add_rows attribute determines whether or not the Add Row button is to be displayed and is also set by default on the settings page. However, you can modify it for each form. Set add_rows equal to true to display, or false to hide. Examples: [wcbulkorder add_rows="false"] , [wcbulkorder add_rows="true"]
  • category: The wcbulkorder shortcode allows you to restrict product display to a specific set of categories. To implement this feature, add a comma separated list of product category ids to category attribute. Example: [wcbulkorder category=”17,28″]
  • excluded: With this attribute you can exclude specific products from the bulk order form’s search. The attribute accepts a comma separated list of product ids. You can exclude products globally from the product admin using this extension. Example of shortcode attribute: [wcbulkorder exclude="12,27,92,114,115"]
  • included: Use this attribute to limit the form to only search a specific set of products. The attribute accepts a comma separated list of product ids. You can include products globally from the product admin using this extension. Example of shortcode attribute: [wcbulkorder include="12,27,92,114,115"]

As you can see the shortcode provides you with a lot of freedom and flexibility. If you have questions about its implementation, please don’t hesitate to ask below or email support@wpovernight.com

If you need to get the bulk order form for your store, click here.